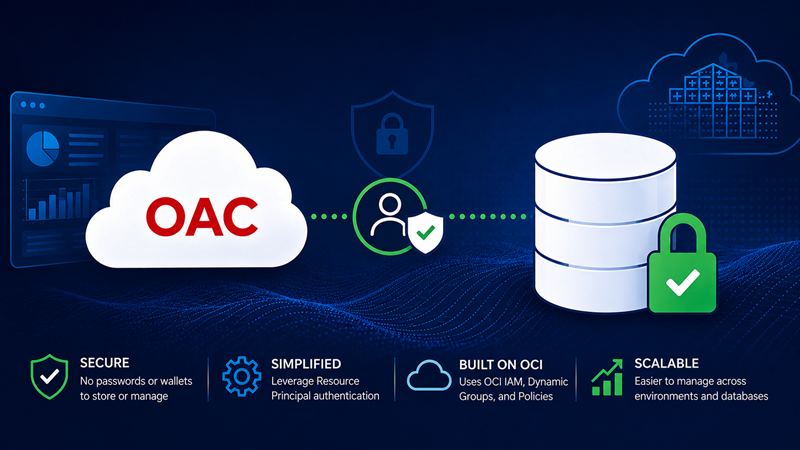
Creating a basic connection from Oracle Analytics Cloud (OAC) to Autonomous AI Database is straightforward: upload the database wallet and provide a database username and password. While this works well for a small number of connections, it can become difficult to manage at scale. You may need separate connections for different databases and schemas, and you may have to replicate them across multiple environments such as development, test, and production. Passwords can expire, wallets may need to be updated, and database credentials must be securely managed and shared with the appropriate users. What starts as a simple configuration task can quickly turn into an operational burden, increasing maintenance overhead and introducing unnecessary security risks.
In this article, I’ll show you how to use a resource principal to establish a passwordless and secure connection from OAC to Autonomous AI Database: your DBAs and sleep schedule will thank you!
What is a Resource Principal?
A resource principal allows a resource to authenticate to other services in Oracle Cloud Infrastructure (OCI) using its own identity.
There are a few components involved in making this work. A dynamic group identifies the resources that are allowed to act as a resource principal, while an IAM policy grants that group the required permissions. On the Autonomous AI Database side, the authenticated principal must also be authorized to connect to the database and access the required data. Together, these components establish a trust relationship that allows OAC to connect to Autonomous AI Database without having to store and maintain traditional credentials.
In the following sections, I’ll put this into practice using my OAC and AI Lakehouse instances, both located in the FedericoVenturin compartment of my tenancy.
Create a Dynamic Group
I’ll start by creating a dynamic group that includes any OAC instance in my FedericoVenturin compartment.
Before proceeding, make sure you have the OCID of the compartment containing your OAC instances, as you’ll need it when defining the matching rule. You can find it in the OCI Console by navigating to Identity & Security > Compartments and selecting the appropriate compartment.
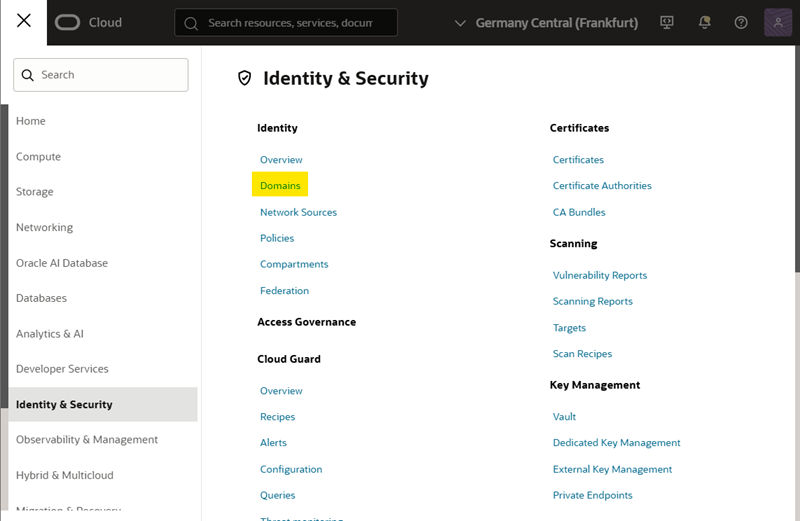
Sign in to the OCI Console. Expand the Navigation menu, click Identity & Security, and then click Domains (Figure 1).
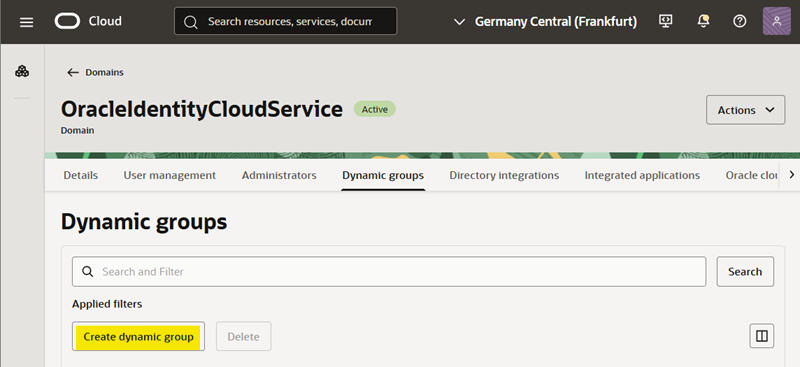
Click your domain, select the Dynamic groups tab, and click Create dynamic group (Figure 2).
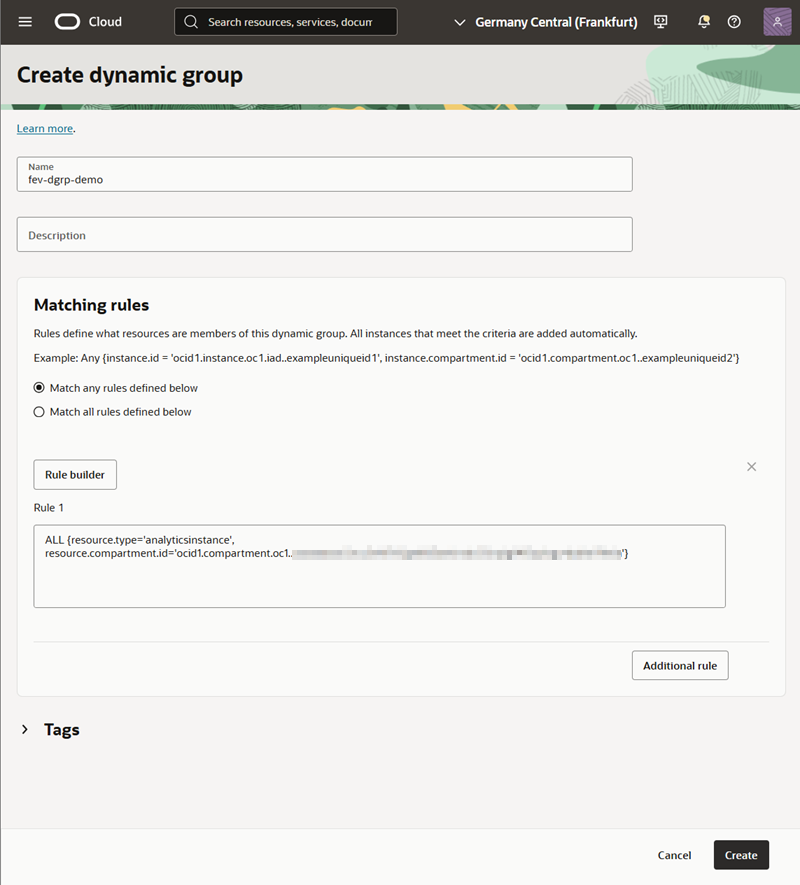
On the Create dynamic group page, provide a name, an optional description, and the matching rules to define which resources belong to your dynamic group. Since I want to include all OAC instances in my FedericoVenturin compartment, I used the following:
ALL {resource.type='analyticsinstance', resource.compartment.id='<COMPARTMENT_OCID>'}
Replace <COMPARTMENT_OCID> with the OCID of the compartment containing your OAC instance, then click Create (Figure 3).
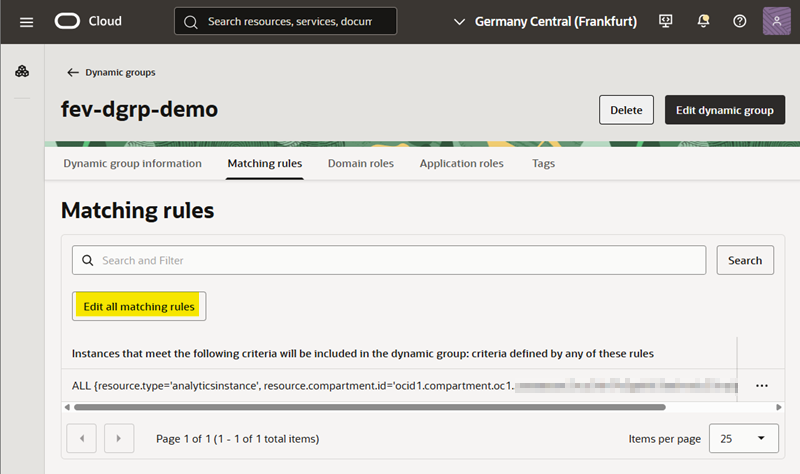
Creating a dynamic group usually takes a few seconds. Once completed, you’ll be taken to the dynamic group page. From there, you can navigate to the Matching rules tab and click Edit all matching rules if you need to modify the rules–for example, to make membership broader or more restrictive depending on your requirements (Figure 4).
Create an IAM Policy
Now, I’ll create an IAM policy to grant the dynamic group the required permissions to access Autonomous AI Databases instances in my FedericoVenturin compartment.
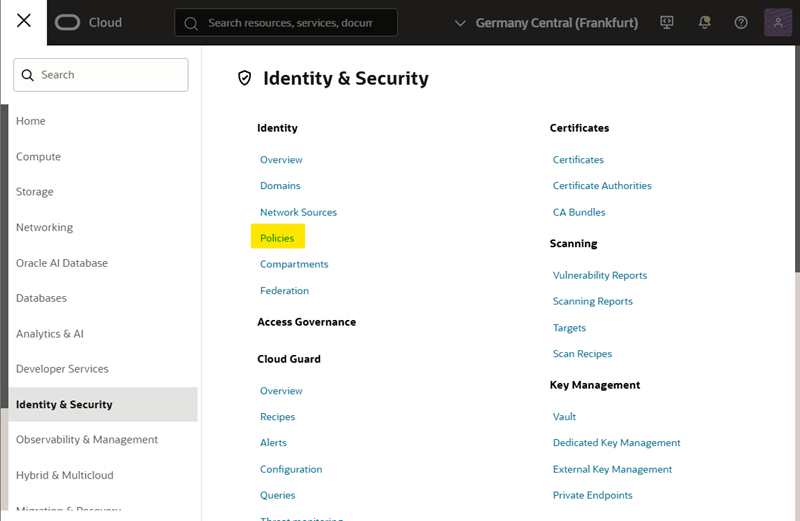
In the OCI Console, expand the Navigation menu, click Identity & Security, and then click Policies (Figure 5).
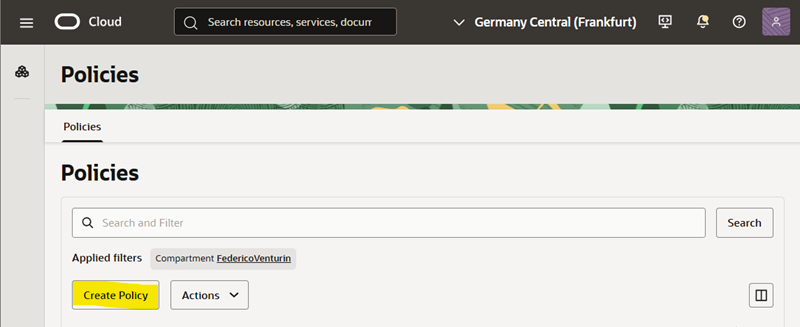
On the Policies page, click Create Policy (Figure 6).
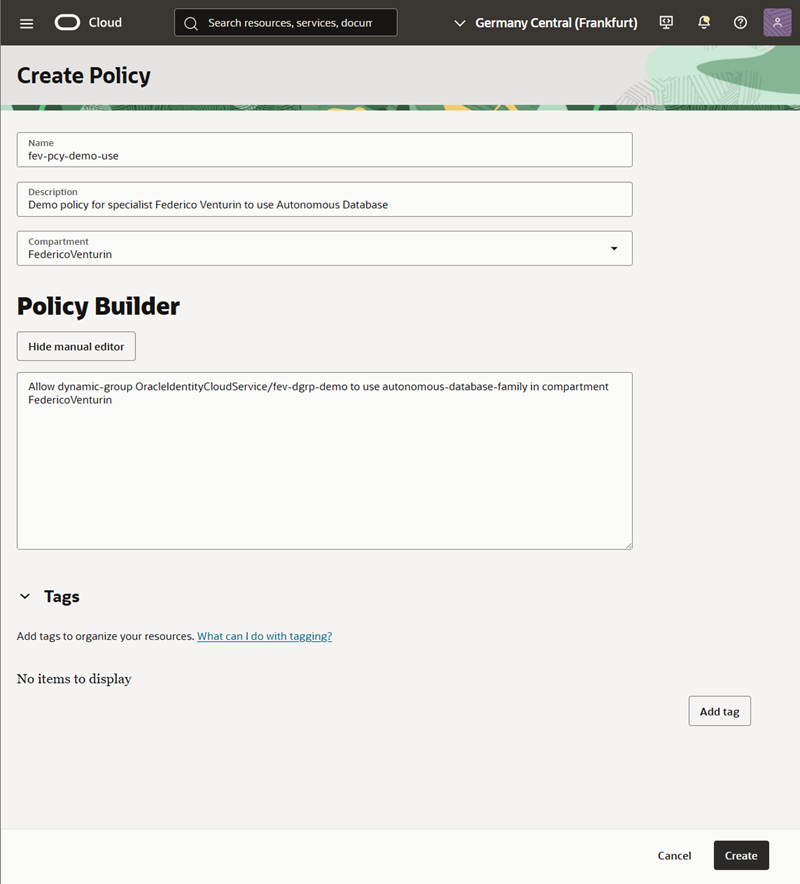
On the Create Policy page, provide a name and a description for your policy. Select the compartment containing your Autonomous AI Databases instance, click Show manual editor, and enter the policy statement. I used the following:
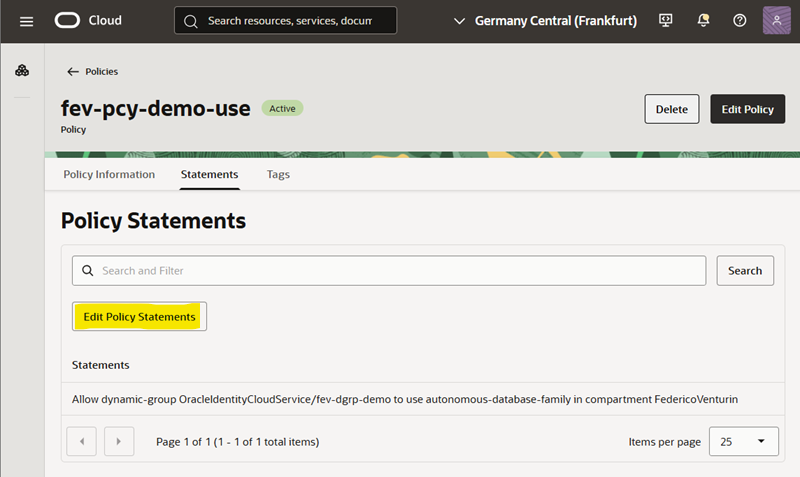
Allow dynamic-group OracleIdentityCloudService/fev-dgrp-demo to use autonomous-database-family in compartment FedericoVenturin
In this statement, OracleIdentityCloudService/fev-dgrp-demo identifies the IAM domain and dynamic group containing my OAC instances, while FedericoVenturin identifies the compartment containing my Autonomous AI Database instances.
Replace OracleIdentityCloudService/fev-dgrp-demo with the IAM domain and dynamic group you created in the previous section, and FedericoVenturin with the name of the compartment containing your Autonomous AI Database instance. Then click Create (Figure 7).
Creating an IAM policy usually takes a few seconds. Once completed, you’ll be taken to the policy page. From there, you can navigate to the Statements tab and click Edit Policy Statements if you need to adjust the policy later (Figure 8).
Map the Dynamic Group to an Autonomous AI Database User
Next, I’ll map the dynamic group created earlier to an existing Autonomous AI Database user (OAC_USER in my case). This mapping allows resources that belong to the specified dynamic group, and have the required IAM permissions, to authenticate to the database as the specified user.
Connect to the Autonomous AI Database you want to use and execute the following commands as ADMIN, or another account with administrative privileges:
ALTER USER OAC_USER IDENTIFIED GLOBALLY AS 'IAM_GROUP_NAME=OracleIdentityCloudService/fev-dgrp-demo';

EXEC DBMS_CLOUD_ADMIN.ENABLE_EXTERNAL_AUTHENTICATION(type => 'OCI_IAM');

EXEC DBMS_CLOUD_ADMIN.ENABLE_RESOURCE_PRINCIPAL(username => 'OAC_USER');
Replace OAC_USER with the database user you want OAC to connect as, and OracleIdentityCloudService/fev-dgrp-demo with your IAM domain and dynamic group.
At this point, the OCI identity represented by your dynamic group is mapped to a database user, OCI IAM authentication is enabled on the database, and the database user is enabled to use the resource principal credential.
Create an OAC Connection Using Resource Principal Authentication
Lastly, with the dynamic group and IAM policy in place, and the dynamic group properly mapped to a database user, I’ll create an OAC connection using resource principal authentication.
The Create and Edit Connection to OCI Databases with Resource Principal permission is required to create this type of connection. This permission is assigned by default to the BI Service Administrator role.
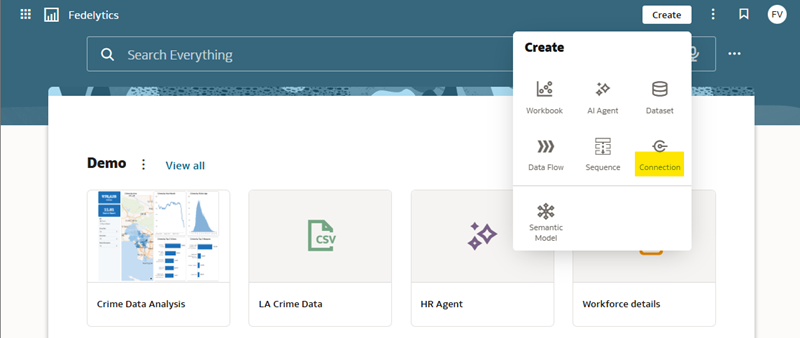
On the OAC homepage, click Create and select Connection (Figure 9).
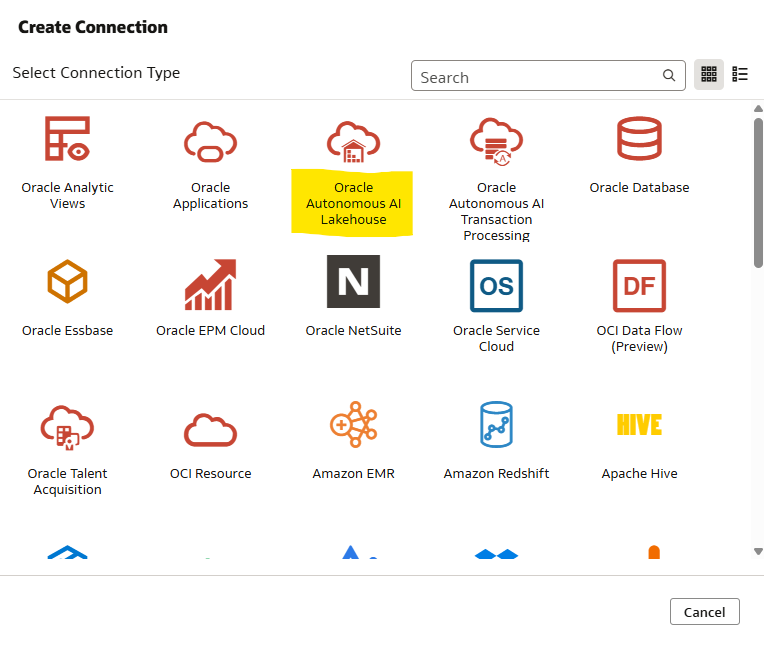
Select Oracle Autonomous AI Lakehouse as the connection type (Figure 10).
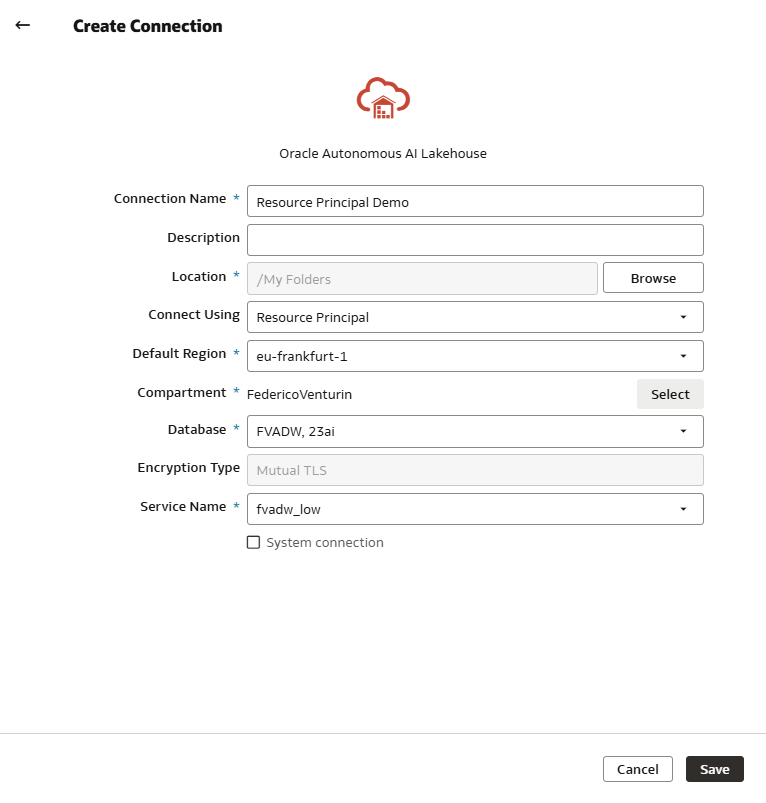
In the Create Connection dialog, provide a name for the connection and, optionally, a description. For Connect Using, select Resource Principal instead of Basic. Select the region where your Autonomous AI Database is running and the compartment containing it. The Database list will then be populated with the available databases. Select the one you want to connect to, and finally choose the appropriate Service Name from the list. Once done, click Save (Figure 11).
OAC will attempt to authenticate and establish a connection to the selected database. If everything has been configured correctly, the connection will be saved and a success message will be displayed.
That’s it! You now have an OAC connection to Autonomous AI Database that doesn’t require you to store or manage a database password or wallet.
Troubleshooting, Tips, and Lessons Learned
You may not get everything working on the first attempt. If OAC fails to establish the connection, you may need to adjust your dynamic group matching rules and/or policy statements. Also, keep in mind that changes in OCI may take some time to become effective. In my testing, changes to policy statements were reflected almost immediately, while changes to dynamic group matching rules sometimes took considerably longer, even a few hours. This is worth remembering while troubleshooting, as a configuration that appears not to work may simply need more time to propagate.
I also tried to make the policy more restrictive rather than granting access to every database in the compartment by using the following statements:
Allow dynamic-group OracleIdentityCloudService/fev-dgrp-demo to inspect autonomous-databases in compartment FedericoVenturin
Allow dynamic-group OracleIdentityCloudService/fev-dgrp-demo to use autonomous-database-family in compartment FedericoVenturin where target.id = '<DATABASE_OCID>'
Although this type of restriction is documented, I wasn’t able to make it work successfully in my testing. As a workaround, if you need to restrict access to a specific database, you can place the database in a dedicated compartment and use the compartment-level policy described earlier in this article.
Finally, instead of mapping your database user to the entire dynamic group, you can make the database-side configuration more restrictive by mapping the user directly to a specific OAC instance using its OCID:
ALTER USER OAC_USER IDENTIFIED GLOBALLY AS 'IAM_PRINCIPAL_OCID=<OAC_OCID>';
This way, even if your dynamic group contains multiple OAC instances, only the specified one is mapped to that database user.
Conclusion
Using a resource principal to connect OAC to Autonomous AI Database provides a secure, scalable alternative to traditional username-and-password authentication. By eliminating the need to store and maintain database passwords and wallets in your OAC connections, you simplify connection management across multiple databases and environments. This significantly reduces the operational overhead and security risks associated with credential management. With resource principal authentication in place, your OAC connections are easier to maintain, more secure, and–best of all–give both DBAs and your sleep schedule fewer things to worry about.